Makeover Monday: Spot Removal Tool

A good photographer looks around the area before beginning their session.

Trash under the bench your subject is sitting on;

It doesn’t seem like a big deal now.

When that photograph is blown up & hung on the wall,

that nasty trash isn’t going to look as inconspicuous.

Look behind. Above. Under. Around. 

Sometimes you miss something. The object can’t be moved. Or, you don’t feel like puling all those weeds!

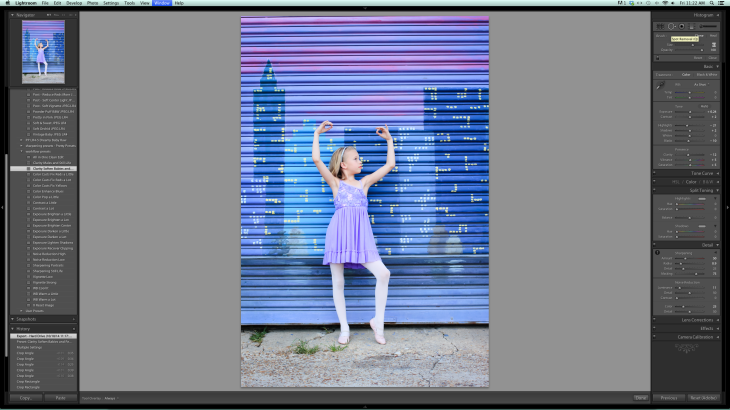
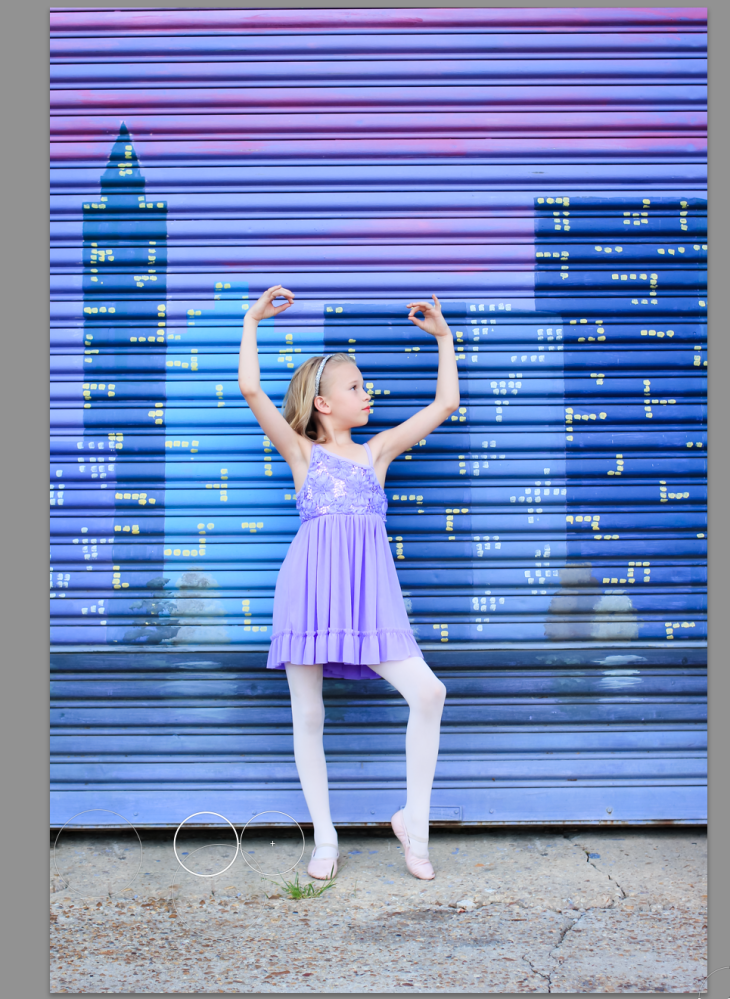
I’m going to show you step by step what I did to “clean up” this photo.

IMG_0152-3

Sometimes “clean up” style edits are easier to do in Photoshop (PS) or Photoshop Elements. (PSE)

However, Lightroom is capable & what I had on hand to edit on this photo.

The first thing I did was my use a “All in One Clean Edit” preset that I have.

Next, I used the crop overlay tool to straighten the image.

Then the soften image preset.

Presets & crop overly I went over on a previous post, “Basic Tools”.

IMG_0152-2

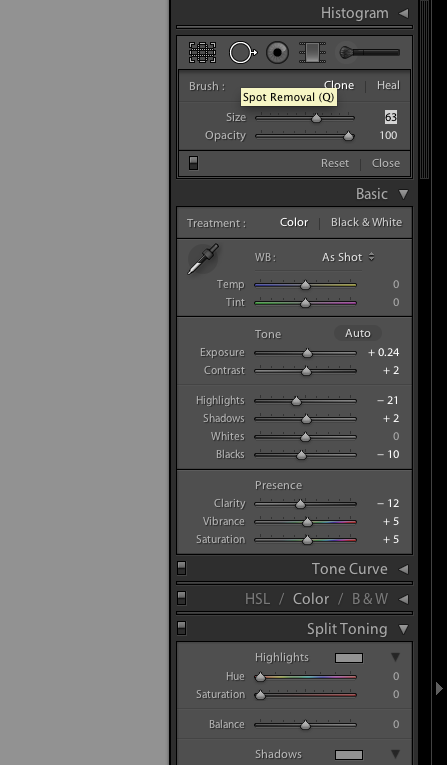
I’m going to introduce a new tool: Spot Removal.

In Lightroom 4 my spot removal is shown on the top right.

It’s the the circle with the arrow pointing to the side, next to our crop overlay tool.

Screen Shot 2014-10-10 at 11.22.59 AM

Screen Shot 2014-10-10 at 11.22.59 AM

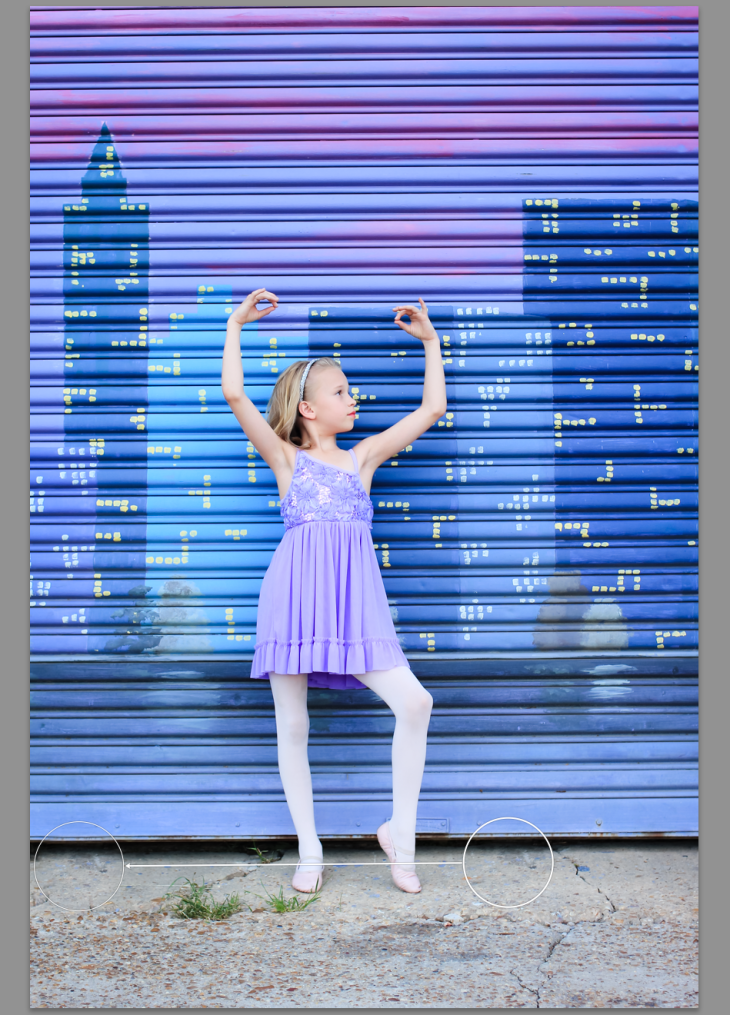
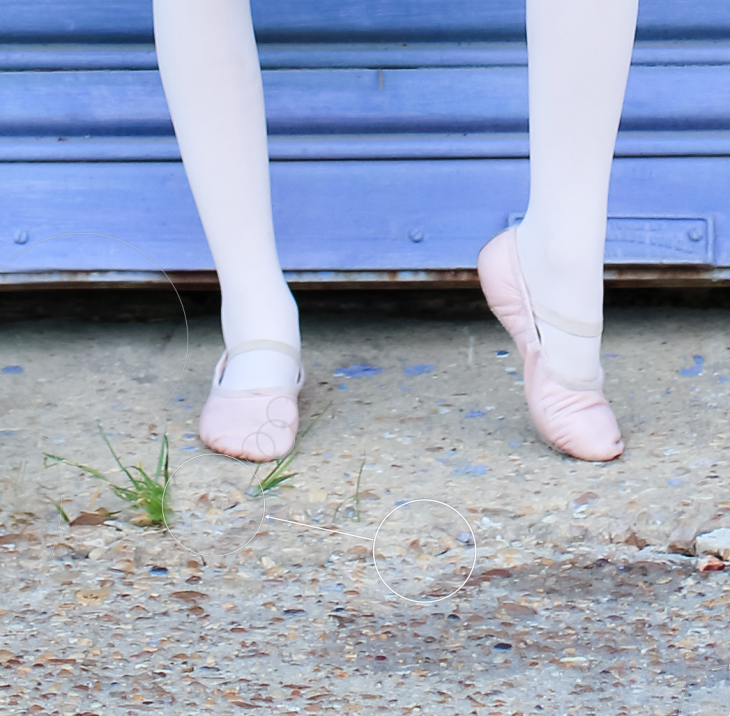
This tool works as a clone.

You choose the spot that you want to remove.

But, then you need a new a spot to “clone” into it’s place.

I used the other side of her, to replace the spot where the weed was growing.

Screen Shot 2014-10-10 at 11.29.15 AM

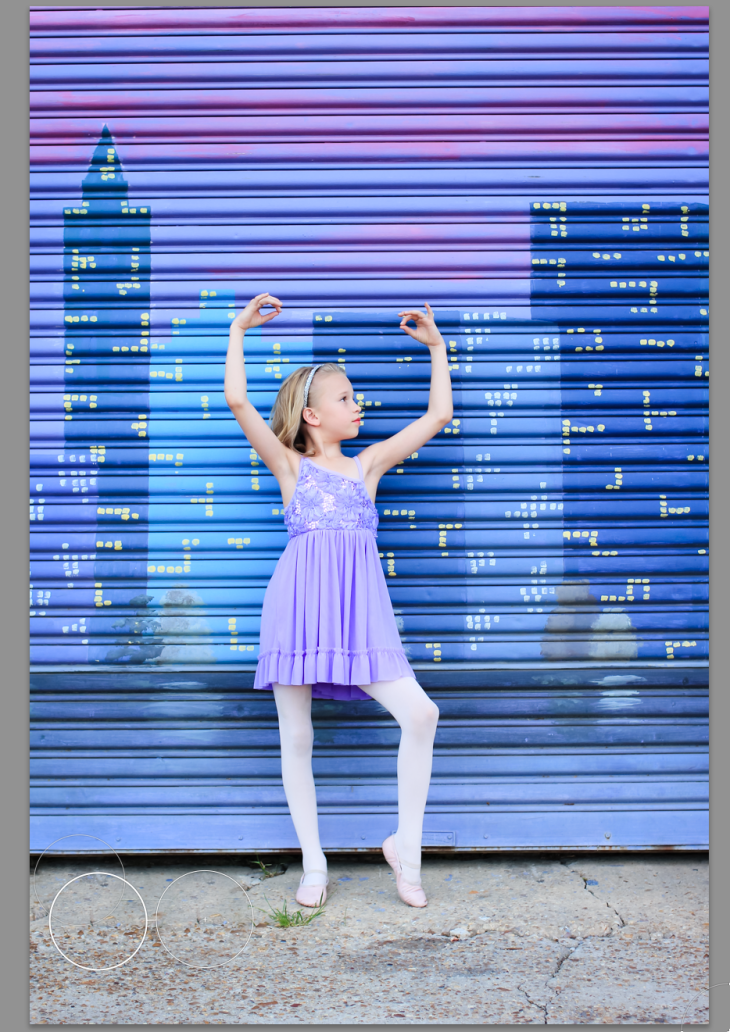
The same with the next large weed

Screen Shot 2014-10-10 at 11.31.23 AM

and so on…

Screen Shot 2014-10-10 at 11.33.22 AM

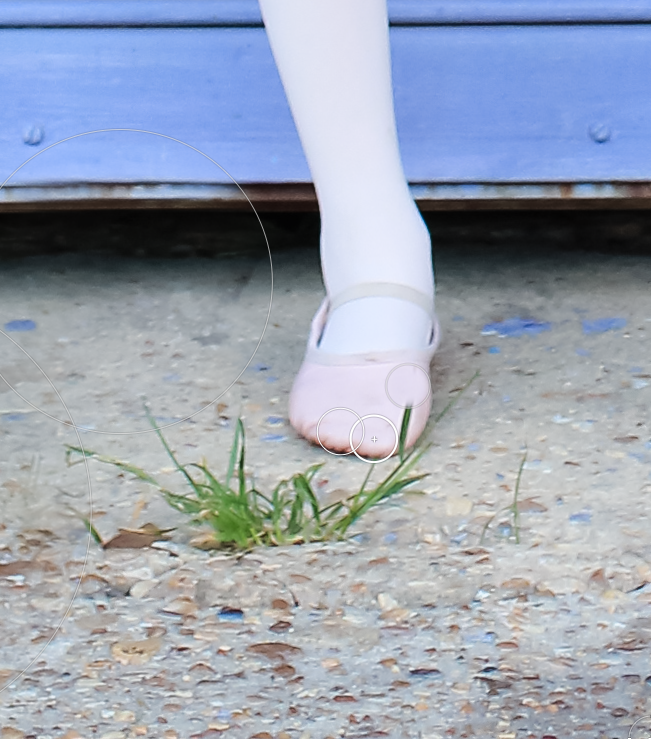
The next part is trickier. Because there is grass on her shoe.

I have to blow the photo up & move small piece by small piece.

Remember this is a clone. So, for every piece I remove I need to find a new piece to replace it.

Screen Shot 2014-10-10 at 11.35.36 AM

I continue to work my way around the shoe.

It takes time finding the best replacement pieces so that it’s not obvious that it’s been touched up.

Screen Shot 2014-10-10 at 11.38.49 AM

Zooming in & out to make sure it’s looking cohesive still.

Sometimes when you zoom out you’ll find a piece you thought was good, is actually much brighter or darker & is obvious that it’s touched up.

Screen Shot 2014-10-10 at 11.45.02 AM

You’ve checked to make sure everything looks good both zoomed in & zoomed out.

Now, a final look over.

I decide I want to add a color punch preset, increasing the vibrance & saturation to add a pop of color.

Screen Shot 2014-10-10 at 11.48.35 AM

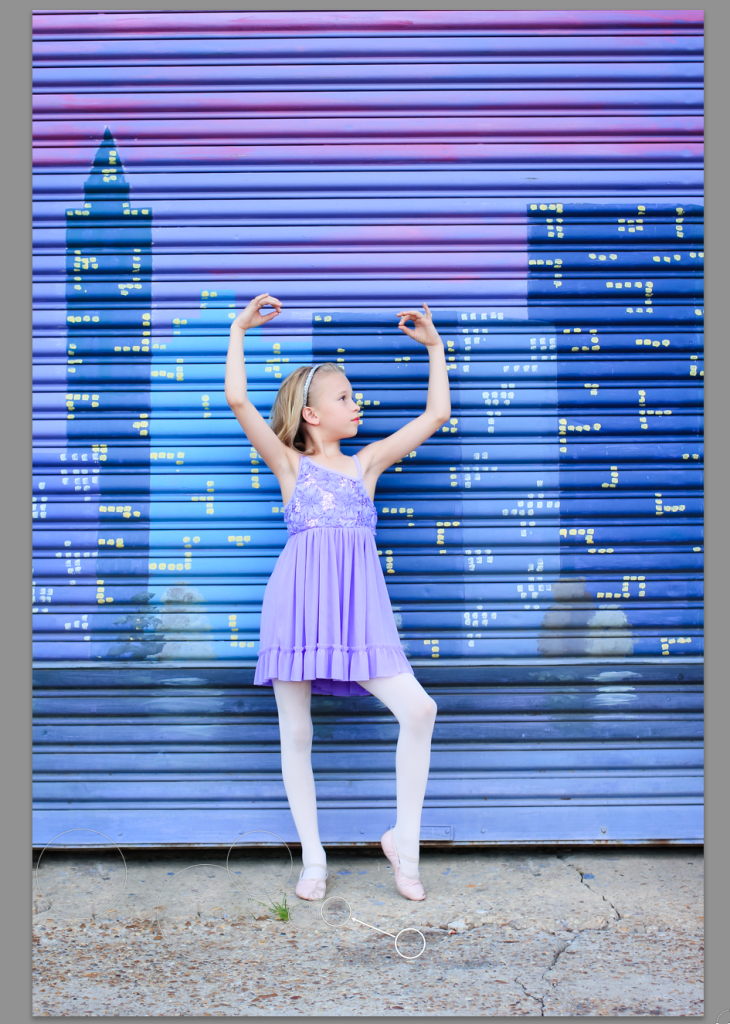
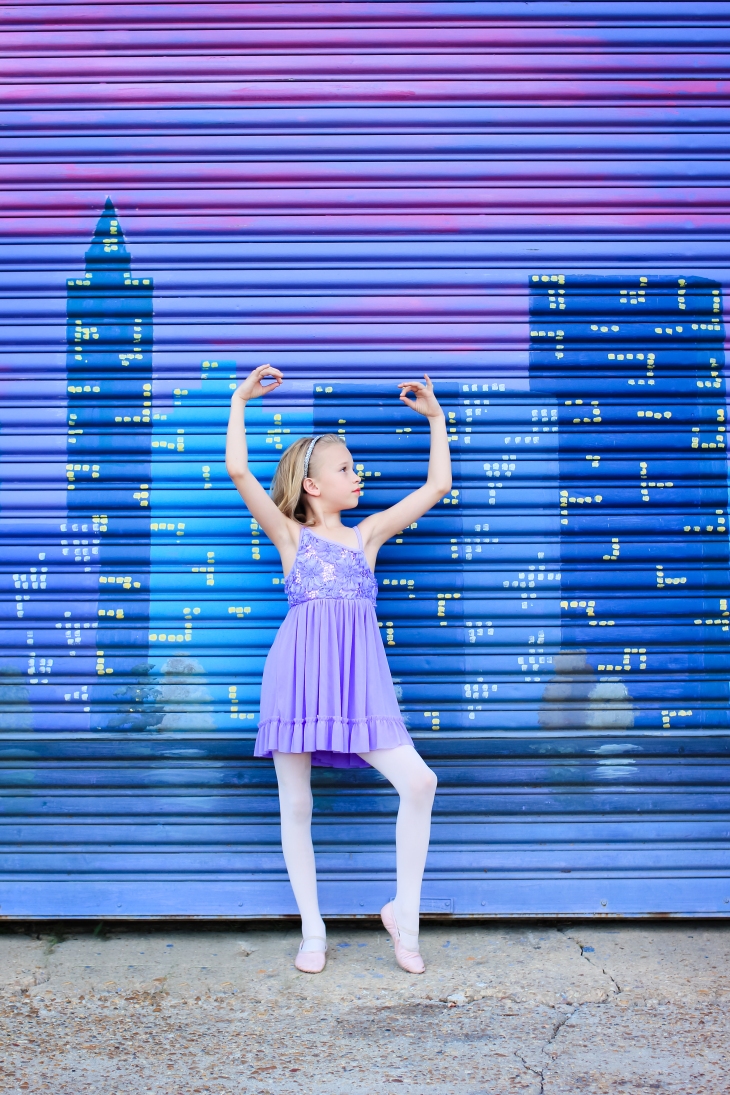
Here’s my final results…

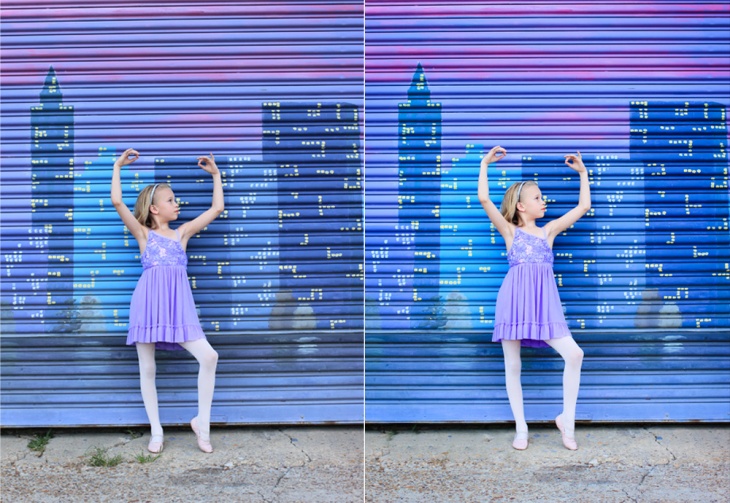
BandA

I hear a lot of rumblings about why photographs charge so much.

It’s because edits like this take time. This one photo took about 15 minutes.

The details around the shoe was a majority of that time.

Most of my clients receive at least 15-20 images in their gallery.

Ideally, I am finding locations & knowing how to take a good SOOC photo, so that I don’t have to spend 15+ minutes editing one photo.

In general most photographers do at least some editing to the photos that you purchase.

IMG_0152-2

Hopefully, these last couple of weeks my “Makeover Mondays” have helped you to learn something new about editing.

If you’re attempting to learn more about photography continue to practice, practice, practice.

If you’re just following along & viewing my work….Keep in mind how much goes into making each your photos perfect!

There’s more to photography than just clicking a button on your fancy camera.

If you’ve enjoyed this post please take a minute to view & like my Facebook page by clicking {HERE}

Makeover Monday: Softening your photos

When I first started out pursuing photography

I would spend hours looking at other peoples work, trying to somehow learn from them by studying their images.

FYI: it doesn’t really work that way!

I loved the “soft” look that the people I admired seemed to capture in every photo.

IMG_0496

Being a newbie I tried to figure out how to capture that myself.

I couldn’t seem to get it SOOC (straight out of camera)

A lot of that had to do with my focus.

Last Monday I talked about having a good SOOC photo in order to make your editing work easier.

A good SOOC photo requires significant lighting, good composition, clear focus.

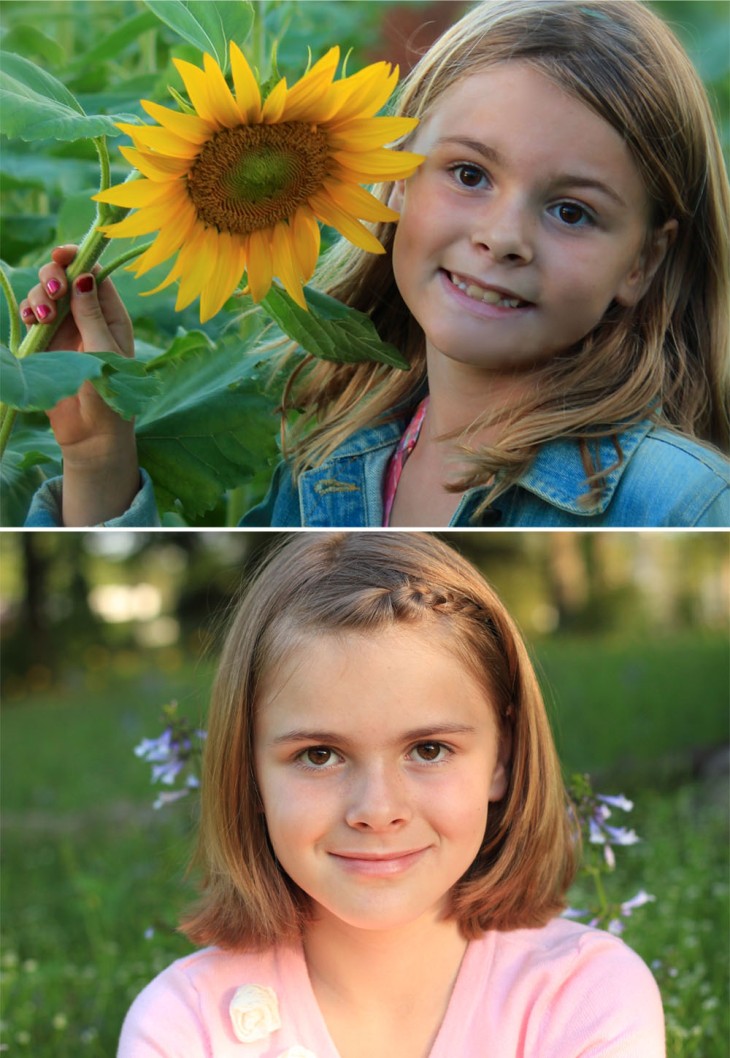
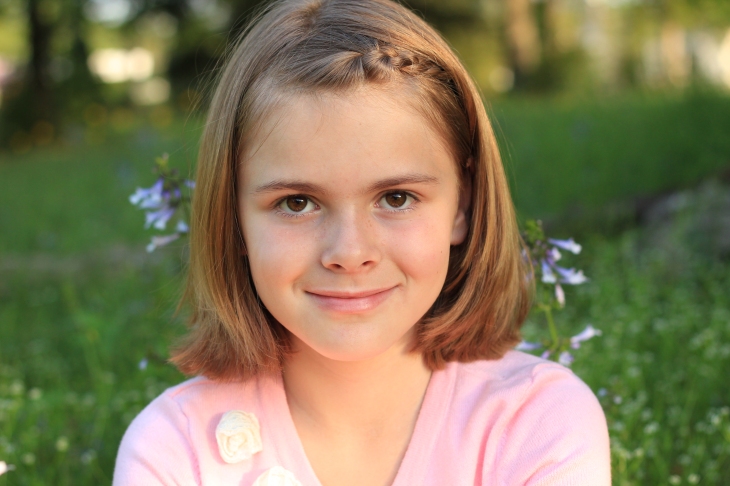
Here are 2 photos SOOC

SOOC

The top is one of my first times shooting in manual.

The bottom was taken this last spring.

As you can see in my earlier photo, I had not yet got a handle on lighting or focus.

You can do quite a bit to change your lighting with editing software. But, nothing can fix an out of focus image.

When I first stated playing around in Lightroom (the primary editing software I use)

I noticed that the was an adjustment for “noise reduction” listed under details.

I assumed if I moved the Luminance bar all the way to the right (reducing the noise) my photo would look soft.

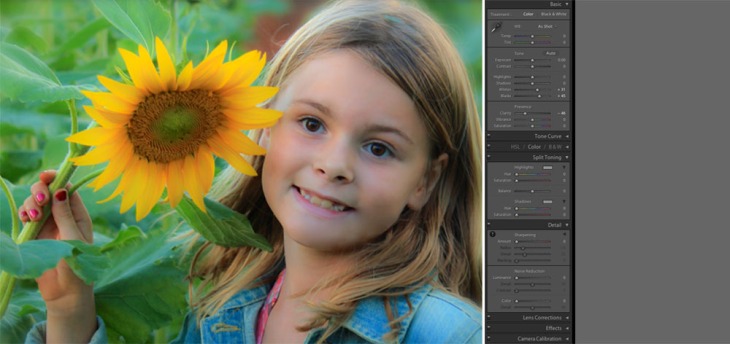
Or if I moved my clarity down (the pic below is at -46 clarity) it would look soft.

howtosunflower

All either of those do though is eliminate detail in your photos.

It’s too soft! The details in her face & on the sunflower are almost non existent when done that way.

With my later photo I had good focus & decent lighting to start with.

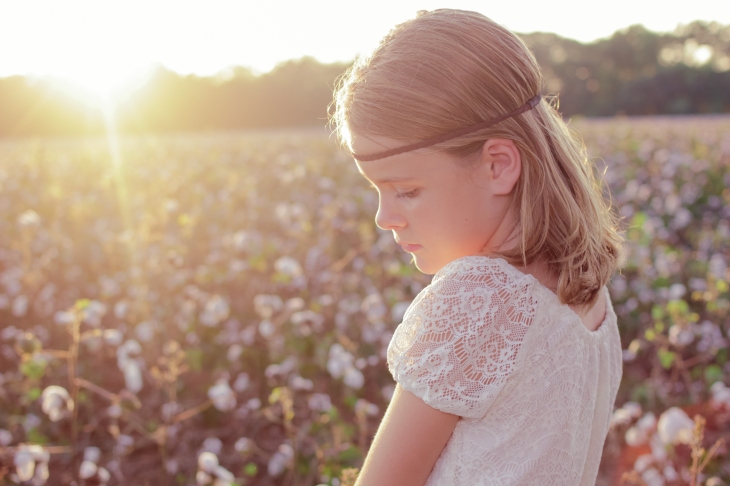
IMG_0326-3

I actually like the later photo a little darker.

So, all I wanted to do was soften it just a tad.

I only soften a photo when it’s women of children.

To me it gives a innocent look.

It doesn’t alter the important details.

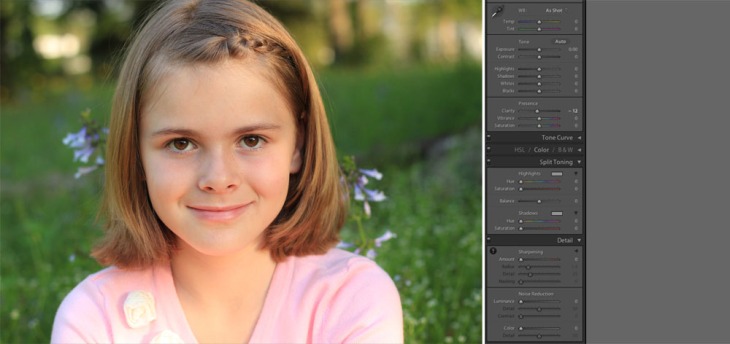
It only softens some of the outer edges/ background.

HowtoField

To achieve this you simply need to adjust your clarity.

I almost always set an image to -12 (clarity) to get the look I want.

****

Don’t be afraid to play with your images.

Make sure to copy your original photos. I usually make up to 5 copies.

Then edit them different ways. Use the compare button to look at them side by side.

Determine which adjustments get the desired look you want.

If you enjoyed this post please take a minute to view & like my Facebook page by clicking {HERE}
Beginning Photography Tips Part 3: Composition

You can go back & view my other 2 posts regarding Basic Camera Settings & Lighting.

Toady we’re going to cover composition.

Have you ever stopped to think about the difference between a snapshot & a photograph?

The difference between a photograph and a snapshots is that a photograph contains artistic elements and it has some dependency on your technical skills as a photographer. A snapshot is just a visual record of whatever is in front of the lens. Today cameras have automatic functions that help with the technical aspect. But, it’s up to you as the photographer to add your own style (or artistic element) to transition it from a snapshot to a photograph.

Snapshots are meaningful to the people who took them; Because of who or what is in the shot. It captures a person, place or event that is special to them, the photographer.

Photographs connect with a wider variety of audience. They engage people. Either because the image tells a story or it looks nicer artistically. It’s photographed in a way that connects you & makes you want to know more about what’s happening.

We’ve all seen the black & white photo of the sailor kissing the nurse. Until recently no one knew who the subjects were. Yet, millions of people were drawn to the photograph. That’s the difference between a snapshot & a photograph.

There are really no rules when it comes to photography; Being that photography is art.

However, there are certain things that will help to make a more artistically appealing image. The composition of an image can be key to distinguishing it from a snapshot & a photograph. We’re going to cover a few things under the umbrella of composition.

1. Have a Focal Point

Is your photo taken in a way that the subject is obvious?

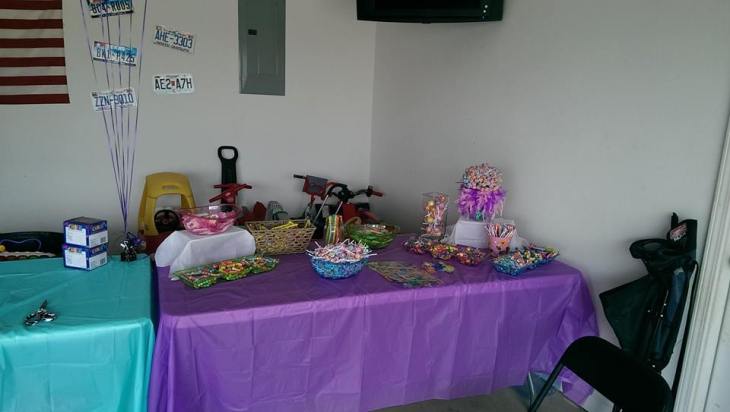
Here we have a snapshot of a party table

1982310_10201153551112519_2004324_n

There’s a lot of things to distract us from the subject. (The subject being, the table draped in purple)

Now, by changing our position & focusing solely on the table in question we can get this

IMG_0224

We’ve created a focal point.

Another way to draw focus to the subject is to make your image black & white.

A black & white photos creates a more intimate looking shot. Sometimes it helps to draw the eye away from distractions & onto what the subject should be

IMG_0145-2

2. Keep Your Horizons, Horizontal

When you’re photographing, your hand will sometimes naturally tilt to one side. This can result in your subject remaining straight (or fairly straight) & your background being crooked

IMG_1192-2

The ocean should’t be slowly draining into the right side of my image.

Remember to keep your hand straight & steady so that your horizons remain horizontal.

IMG_1192

The exception to this “rule” is when you are artistically making your entire photo “off kilter”. When your subject, as well as your horizon are intentionally not centered, you can create an artistic & visually appealing photograph.

1167392_633024773407325_1725349308_o

(photo above courtesy of Sara Clance Photography)

3. The Rule of Thirds

The rule of thirds is based on the idea that peoples eyes are automatically drawn to certain points in a photo. Think of it like a tic-tac-to grid. If you place your subject in the intersecting points, it’s supposed to make for a more visually appealing photo. Look & see which one you’re drawn to first

IMG_0681

edited BD-6

The rule of thirds is not a must. It just encourages you to think outside the box. You don’t always have to have your subject in the center of the photo.

Some other things that too keep in mind are your viewpoints & angles.

If you have a child or pet or something low to the ground- photograph it at eye level.

550261_420692831317999_1344382811_n

You will see me in some strange and unflattering positions sometimes.

1487366_10152284617389378_1567502124_n

(Thanks for the behind the scenes photo, Jackie)

Shoot at eye level or above for more flattering poses. Especially on women.

 The same photo at different angels can make a nose or forehead look smaller or larger. Different angles will also give a  different style to the image.

IMG_0653

The same position shot from above

IMG_0669

Leave your subject in one spot & move around them to create different looks

Don’t be afraid to fill the frame. I especially love this style on children. Don’t be afraid to zoom in on your subject for a totally different look on a photo

IMG_0198

Finally, be aware of your overall position: Is anything “growing out of their head”, like a tree branch? We talked about shadows, in part 2, watch out for them.  Is there trash in the picture? These aren’t as big a deal for those snapshot style photos. But, if you’re looking for photograph quality – it’s in the details.

Hopefully these tips have helped you think twice about the way you take a picture. More important, I hope you are inspired to go try out some of the tips you’ve learned!

If you like what you’ve read, please click {HERE} and go like my Facebook page
If you have ideas for additional blog tips you’d like to see, just send me a message!

Beginning Photography Tips -Part 2 Lighting

Continuing from Part 1: Beginning Photography Tips: Settings

So now you know the basic settings to use, depending on where you are & what you’re photographing. Lets move on to lighting….

What are your common light sources? Indoor bulb lighting, Florescent lighting, sunshine, candles. Thoes are some examples of the primary sources of light that you’ll encounter.

Outdoor photos have the advantage of using the sun- which is one of the best light sources! When used correctly it gives a warm, rich light that flatters most people. Unlike the very unflattering florescent lights (found in way too many dressing rooms!)

 If you’re just taking everyday snapshots you won’t always be planning ahead to figure out when & where the light is best. So you can remember a couple things:

Avoid direct & harsh (midday) sunlight. This can cause photos to be too bright (over exposed), washed out, etc

Image

 If you’re outdoors in the middle of the day, look for “open shade” to help block out the direct sun.

Open shade is a covering of some kind that is high enough above you that you will still get some sunlight, just not directly. Opposed to just regular old shade (the side of a building) where you’re getting no sunlight. Those photos will be very dark & loose a lot of thier detail. The photo above was taken in the middle of the backyard. I had her take two steps forward, underneath an awning, and the difference is obvious

IMG_0144-2

Another example of open shade would be a large tree. The branches help to block enough of the light so that it’s not directly hitting you. However, it still allows some of the gorgeous sun to come in & make a flattering photo.

This one is not a great photo. They obviously weren’t ready. I’m just showing you how large the tree was and how effectively it blocks the sun

IMG_0836

You can see that the tree helps block that sun enough to eliminate any harsh light/shadows you would otherwise get.

IMG_0831

Pay attention to where the light is.

Are there sun spots on your subject? Is your subject

squinting? Are shadows proving to be a distraction? (Check the subject, as well as nearby walls & the ground for distracting shadows)

IMG_0744

In the photo above you can see that the sun is hitting his neck. It can be distracting. Pay attention to these little details. To solve this, have the subjects switch spots

IMG_0763

She was short enough so that when her back was against the tree (instead of his) the direct light didn’t reach her

A cloudy day is the best to photograph in (if you’re shooting mid day)It provides an automatic covering from the sun. Giving you the appearance “open shade” even if there is none.

These photos were taken in an open field on a cloudy day

IMG_0016

IMG_0102

Enough light to be flattering. Not so much that it’s too harsh.

 Typically you don’t want your subject looking into the light. You’ll get squinting.

You shouldn’t rely on a flash to light your scene for you. Meaning, it shouldn’t be your sole source of light. Instead, use your flash to eliminate shadows. For example, if you wanted to take a picture of something by a bright window, you’d likely only get a silhouette, or a “not so detailed” photo. All the light would be coming in from the window behind your subject.

IMG_0046-2

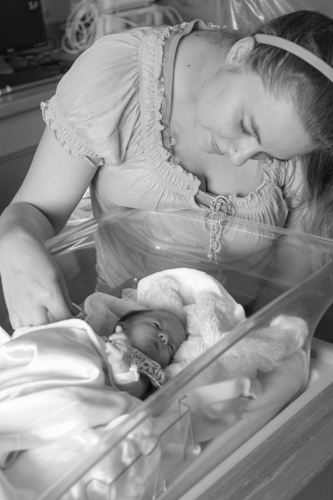
By using your flash to fill in the scene, you’ll illuminate the details on the front of your subject. This photo was taken in a NICU where flash isn’t allowed. So, another option would be to turn the subject towards the light. This is different than them facing the light directly. The window is there to act as a buffer.

IMG_0100-2

With them facing the light, more details are visible.

A term you may have heard when talking about photography & lighting is, “The Golden Hour”. That refers to a time that  is up to 2 hours after sunrise & 2 hours before sunset. That is when you get the softest, warmest light. It’s a very flattering time of day to photograph. And comes off “golden looking”.

IMG_0135-2

IMG_0074

IMG_0077

If you’re wanting to get a reflection of light in the eyes of your subject (which is ideal)

IMG_0178

You either need to have their eyes facing towards your light source or you need to use a reflector to “bounce” the light back into their eyes.

 Understanding light & where to place it is one key element to improve your photos. Practice taking photos in different types of light. Stand your subject in one spot & then move around them. Pay attention to where the light is in the photo that looks the best and go from there.

Tomorrow we will be going over composition & how it can help determine the difference between a snapshot & a photograph.

If you haven’t already please click {HERE} to go and like my Facebook page
Beginning Photography Tips – Basic Camera Settings

I’m part of a group on our Military installation called PWOC (Protestant Women of the Chapel). Every year they host a Workshop Day, offering all sorts of awesome classes to women in our community. I was so excited (and quite a bit nervous) to be asked to teach a Beginning Photography Class.

I decided to share my notes with you…. Hopefully, not putting myself out of business by teaching you all my tricks!

My goal is to give some simple tips that will help you take a better everyday photo; whether it be with a DSLR, point & shoot or cell phone camera.

The 3 topics we will be covering are:

1. Basic Camera Settings (for DLSR cameras)

2. Lighting

3. composition

If you’re brand spankin’ new to photography…. don’t get overwhelmed! I’m going to cover this all in super simple terms with photos showing what to do and what not to do

So, lets’s get started. For this first part, you need to go get your camera in hand.

I’ll wait.

I’ll wait some more, since you probably didn’t actually go grab it.

Ok, I’m done waiting. We’re going to go over the basic camera settings.

I use a Canon Rebel t2i. I will be covering the settings on my particular Camera. Your camera should have fairly similar settings, give or take a few. For the exact settings that your camera covers, check your owners manual. Or, if you’re like me & have no idea where your owners manual is, google it.

One thing that’s important for you to know is that there are two ways to use you camera. In Automatic or in Manual.

In manual mode, you are in complete control of the camera.

You tell it how much or how little light you want in (ISO)

 How much focus you want put on your subject (Aperture or F stop)

and how fast you want the shutter to open & close (Shutter Speed)

Now unglazed your eyes. We’re not going over all that right now- Remember, I’m teaching the basics.

If you’re first starting out, you will be shooting in automatic.

On my camera my “wheel” (little knob thing) is on the top right of my camera. The auto setting is in the center of the wheel. (My auto is a green rectangle) On the wheel, above the auto setting, is the “Creative Zone” which includes 6 settings that we’re not going to go over. They all require more knowledge on ISO, Shutter Speed & Aperture.

We’ll be focusing on the 6 settings below auto, which is the basic zone.

Full Automatic Mode, (the green rectangle) makes all exposure decisions for you.

You have to use it in the right situations though, or you will not get the best quality photo. For example, if you’re trying to take shots of your kids riding their bikes, you’re still gonna get some blur. It’s also not going to work well in dim lit or night lighting

This photo is taken indoors in full auto. Because it’s just regular household bulbs, it gives off this yellow tint

IMG_0622

If you were to have shot this in manual, where you could have control over the way your camera sees this light (by adjusting your white balance) you could make it look like this

IMG_0622-2

Your camera is still just a camera. It can only do so much when in auto setting.

However, when you’re outdoors, shooting in auto, you will usually be able to get a good photo.

If you’re outdoors & want an even better photo, be sure to use the other settings on your wheel.

Read the following descriptions. They will tell you which setting you should be using, depending on the situation.

Sports Mode: (Icon: The super skinny running guy) Uses a faster shutter speed to capture fast-moving subjects. Great for sport event or even if you’re just photographing your kids/pets at the park.

Portrait Mode: (Icon: Silhouette of head) This mode uses a large aperture setting to decrease the depth of field, which means – it blurs the background (Bokeh) to emphasize the subject.

Landscape Mode: (Icon: Mountain with cloud) The built-in flash is automatically disabled, even if it’s already raised. Works good for night scenes w/o people if you use a tripod. Unlike portrait mode where only your subject is in focus, landscape mode keeps the entire image in sharp focus from corner to corner.

Close-up Mode/Macro mode (Icon: Flower) Again, no flash. It captures smaller subjects & details. Good for flowers, jewelry, newborn fingers/toes. Check your owner’s manual to find out the minimum close-focusing distance of your lens. How “up close and personal” you can get to your subject depends on your lens, not the camera itself.

Night Portrait Mode: (Icon: The person with the star next to them) Best for taking photos at sunset or night. Or sometimes in a dim lit room. It uses your flash. It will work better with a tripod to avoid a fuzzy photo. Or just steady it on something. A ledge, table, etc. You’ll also want the subject to stand still for a couple seconds after the flash goes off, or it will give them that “ghost/shadow” look.

Flash Off Mode: (Icon: Lightning bolt w/ an arrow on the end, crossed out) Flash Off mode disables both the internal flash and any external flash

So now you know the basic settings to use, depending on where you are & what you’re photographing. Lets move on to lighting….

If you haven’t already, please click {HERE} to go and like my Facebook page
Click {HERE} to view part 2, Beginning Photography Tips: Lighting