
A good photographer looks around the area before beginning their session.
Trash under the bench your subject is sitting on;
It doesn’t seem like a big deal now.
When that photograph is blown up & hung on the wall,
that nasty trash isn’t going to look as inconspicuous.
Look behind. Above. Under. Around.
Sometimes you miss something. The object can’t be moved. Or, you don’t feel like puling all those weeds!
I’m going to show you step by step what I did to “clean up” this photo.

Sometimes “clean up” style edits are easier to do in Photoshop (PS) or Photoshop Elements. (PSE)
However, Lightroom is capable & what I had on hand to edit on this photo.
The first thing I did was my use a “All in One Clean Edit” preset that I have.
Next, I used the crop overlay tool to straighten the image.
Then the soften image preset.
Presets & crop overly I went over on a previous post, “Basic Tools”.

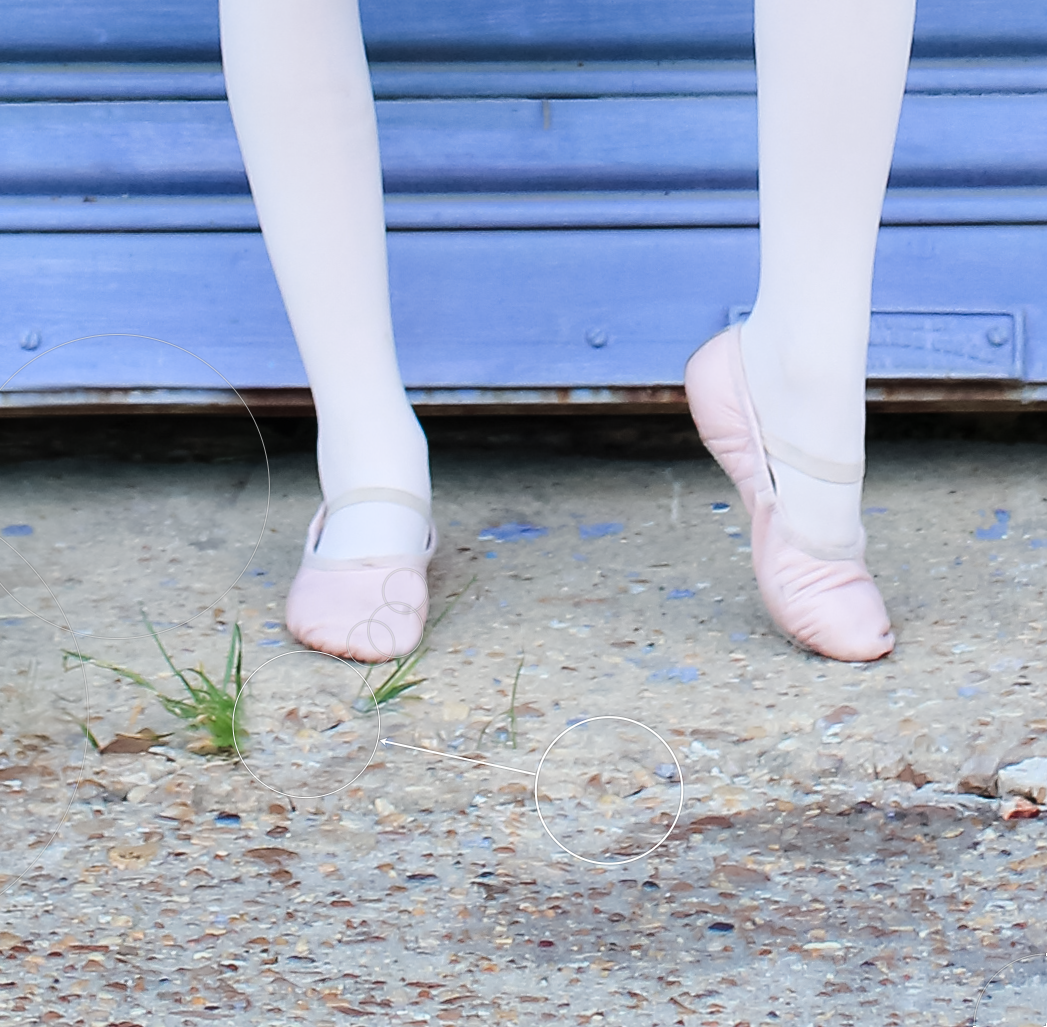
I’m going to introduce a new tool: Spot Removal.
In Lightroom 4 my spot removal is shown on the top right.
It’s the the circle with the arrow pointing to the side, next to our crop overlay tool.


This tool works as a clone.
You choose the spot that you want to remove.
But, then you need a new a spot to “clone” into it’s place.
I used the other side of her, to replace the spot where the weed was growing.

The same with the next large weed

and so on…

The next part is trickier. Because there is grass on her shoe.
I have to blow the photo up & move small piece by small piece.
Remember this is a clone. So, for every piece I remove I need to find a new piece to replace it.

I continue to work my way around the shoe.
It takes time finding the best replacement pieces so that it’s not obvious that it’s been touched up.
Zooming in & out to make sure it’s looking cohesive still.
Sometimes when you zoom out you’ll find a piece you thought was good, is actually much brighter or darker & is obvious that it’s touched up.

You’ve checked to make sure everything looks good both zoomed in & zoomed out.
Now, a final look over.
I decide I want to add a color punch preset, increasing the vibrance & saturation to add a pop of color.

Here’s my final results…

I hear a lot of rumblings about why photographs charge so much.
It’s because edits like this take time. This one photo took about 15 minutes.
The details around the shoe was a majority of that time.
Most of my clients receive at least 15-20 images in their gallery.
Ideally, I am finding locations & knowing how to take a good SOOC photo, so that I don’t have to spend 15+ minutes editing one photo.
In general most photographers do at least some editing to the photos that you purchase.

Hopefully, these last couple of weeks my “Makeover Mondays” have helped you to learn something new about editing.
If you’re attempting to learn more about photography continue to practice, practice, practice.
If you’re just following along & viewing my work….Keep in mind how much goes into making each your photos perfect!
There’s more to photography than just clicking a button on your fancy camera.
If you’ve enjoyed this post please take a minute to view & like my Facebook page by clicking {HERE}
